Open the Pack Builder
Start the KeywordLens backend, then open http://127.0.0.1:8099/tools/pack-builder. You can also open it from Lightroom with Open Offline Pack Builder.
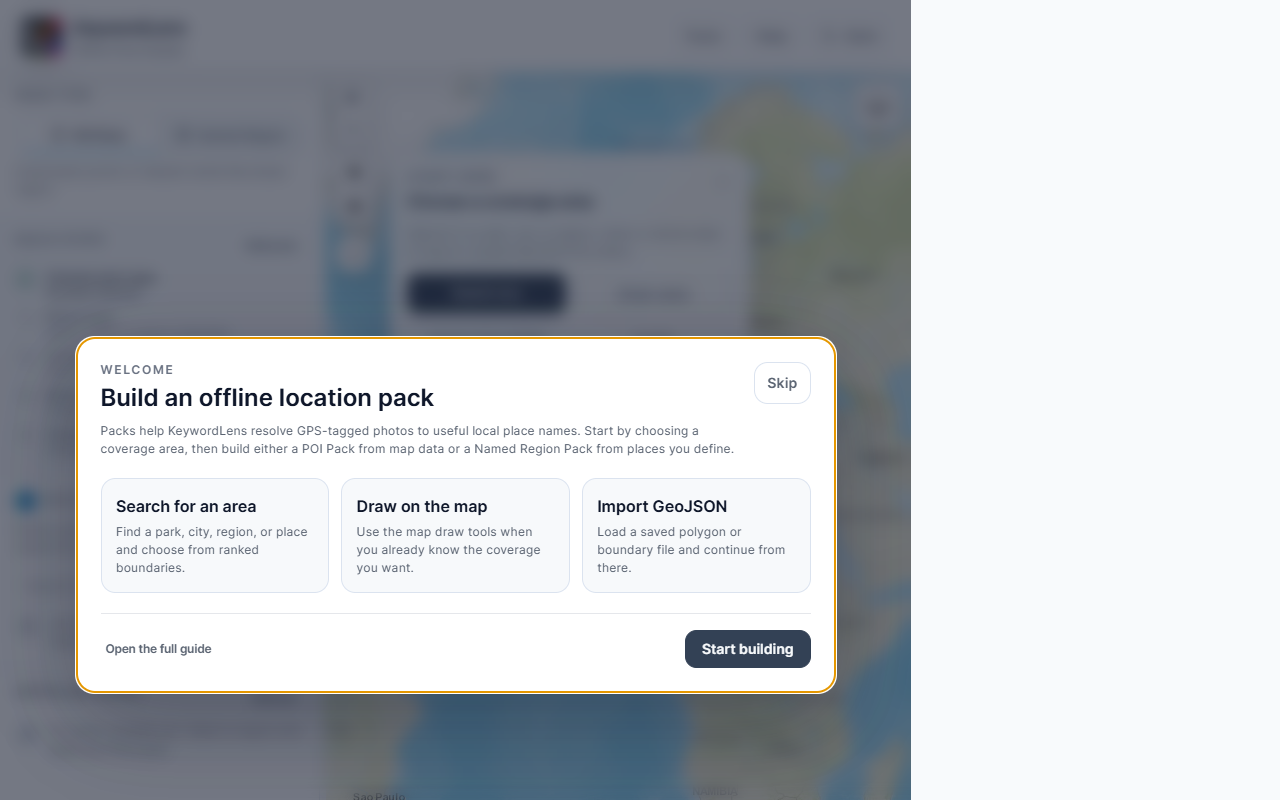
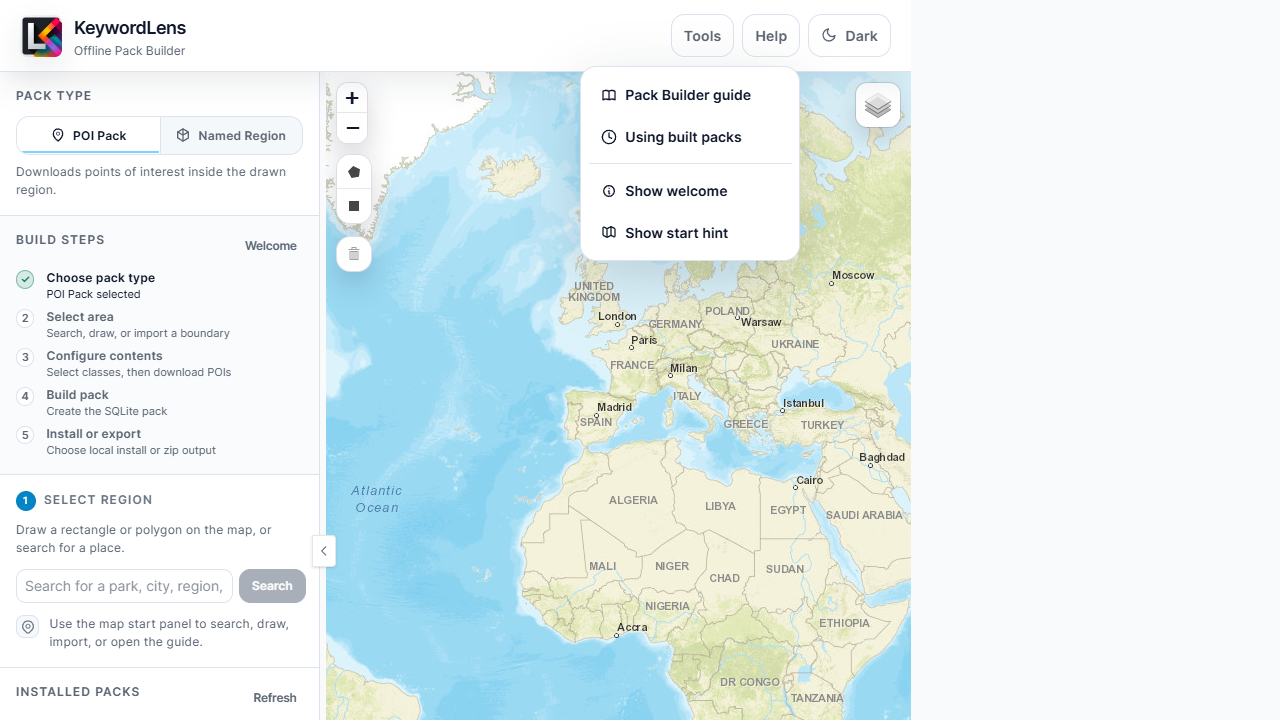
The first visit shows a welcome panel with shortcuts for search, draw, import, and this guide. Returning users go straight to the builder; use Help -> Show welcome to reopen it.
Choose a pack type
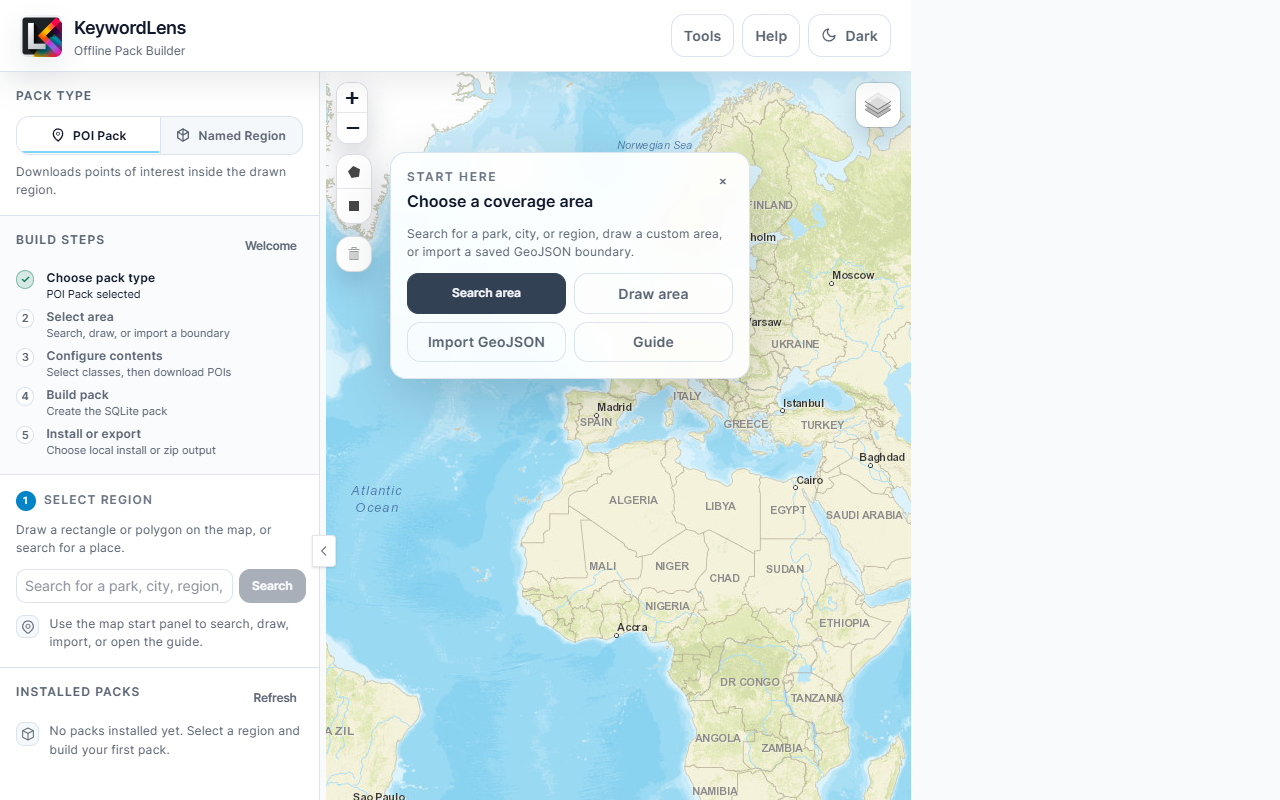
The Pack Type selector changes the workflow shown in the sidebar.
POI Pack
Use this when you want data-derived places inside a region: countries, regions, parks, viewpoints, waterfalls, castles, lodging, and other Natural Earth or OpenStreetMap classes.
Named Region
Use this when GPS-tagged photos should resolve to a place name you choose for a specific area, even when no useful POIs are available. Ideal for national parks, private reserves, farms, venues, and custom travel zones.
Select a region
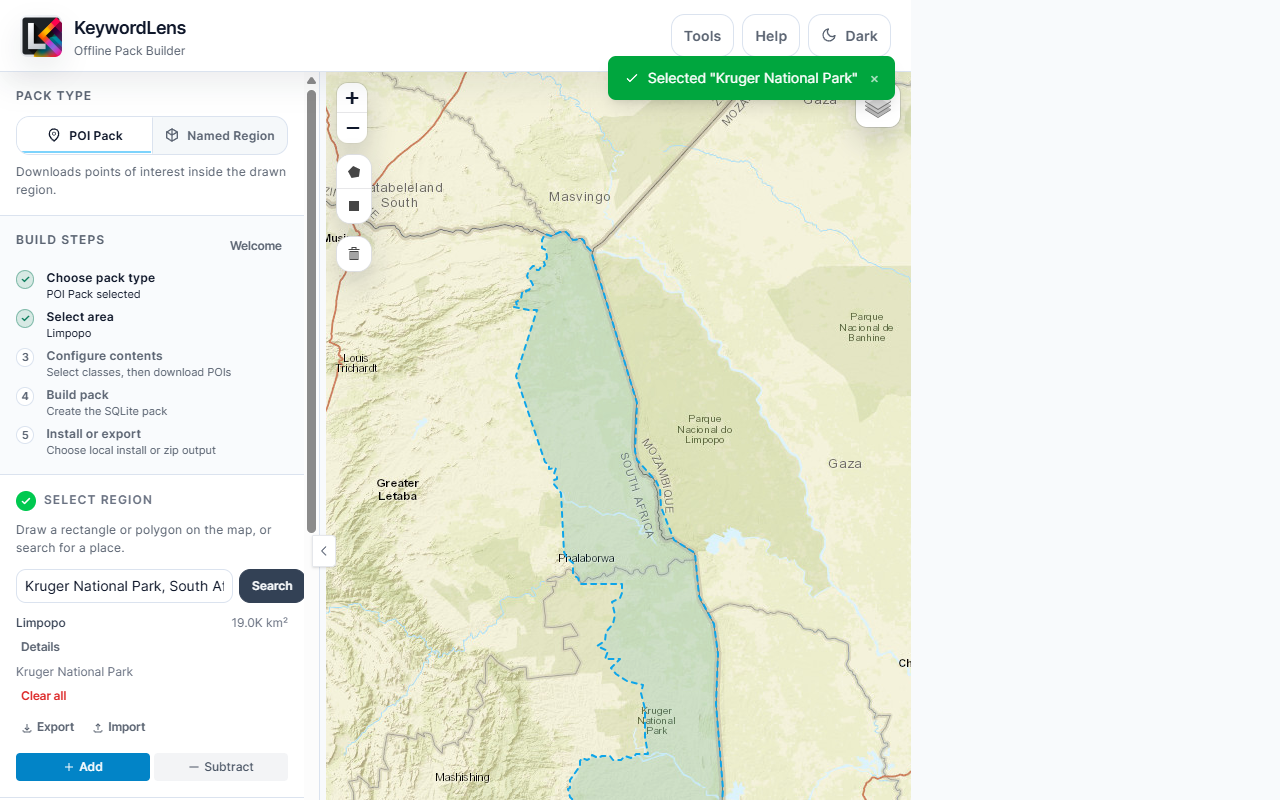
You can select coverage in three practical ways: draw on the map, search for a boundary candidate, or import GeoJSON. Search returns ranked area candidates with place kind, source, approximate area, and warnings so you can avoid accidentally choosing a gate, POI, or partial area.
- Draw: Use the polygon or rectangle tools on the map.
- Search: Type a place such as
Kruger National ParkorBrussels, Belgiuminto the sidebar search field, review the candidates, then click Use this area. - Import: Use Tools -> Import GeoJSON or the sidebar import link to load a saved polygon.
Search works best with English place names and as much context as you know. For example, Camden, London, UK is more likely to find the intended borough than Camden alone, and Kruger National Park, South Africa is better than Kruger.
Use Add and Subtract to fine-tune the selected area. In Add mode, the next shape you draw is added to the current selection. In Subtract mode, the next shape you draw cuts that area out of the current selection. Use the map delete tool when you want to remove selected area shapes. These controls are useful when a searched boundary is almost right but needs a neighboring area added, a wrong section removed, or a custom edge adjusted before you build the pack.
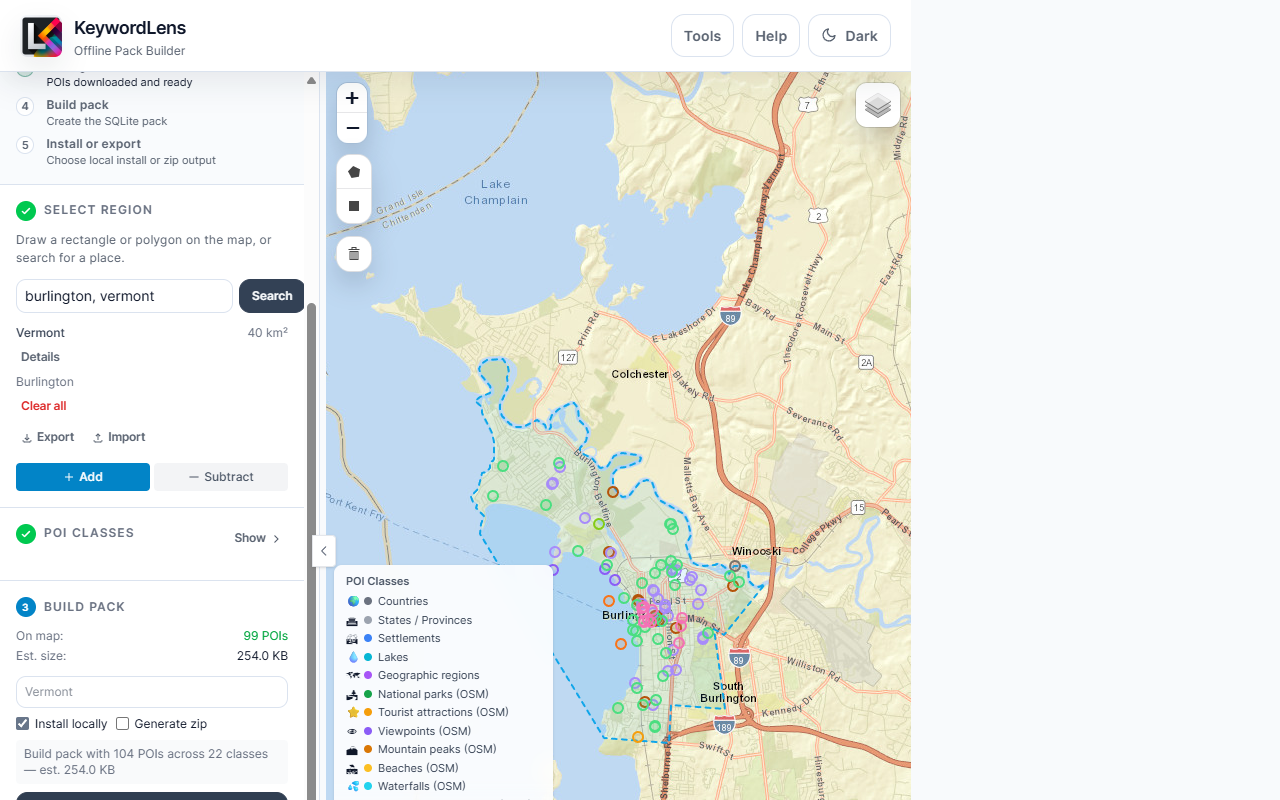
Build a POI Pack
POI packs combine the selected region with feature classes from Natural Earth and OpenStreetMap. They are useful when you want KeywordLens to resolve GPS coordinates to many nearby or containing places.
- Select POI Pack.
- Select or draw a region.
- Review the grouped POI classes. Natural Earth classes show counts quickly; OpenStreetMap classes are downloaded when you click Download POIs.
- Use Select all or individual checkboxes to control what goes into the pack.
- Click Download POIs to preview data on the map.
- Name the pack, choose Install locally and/or Generate zip, then click Build Pack.
Build a Named Region Pack
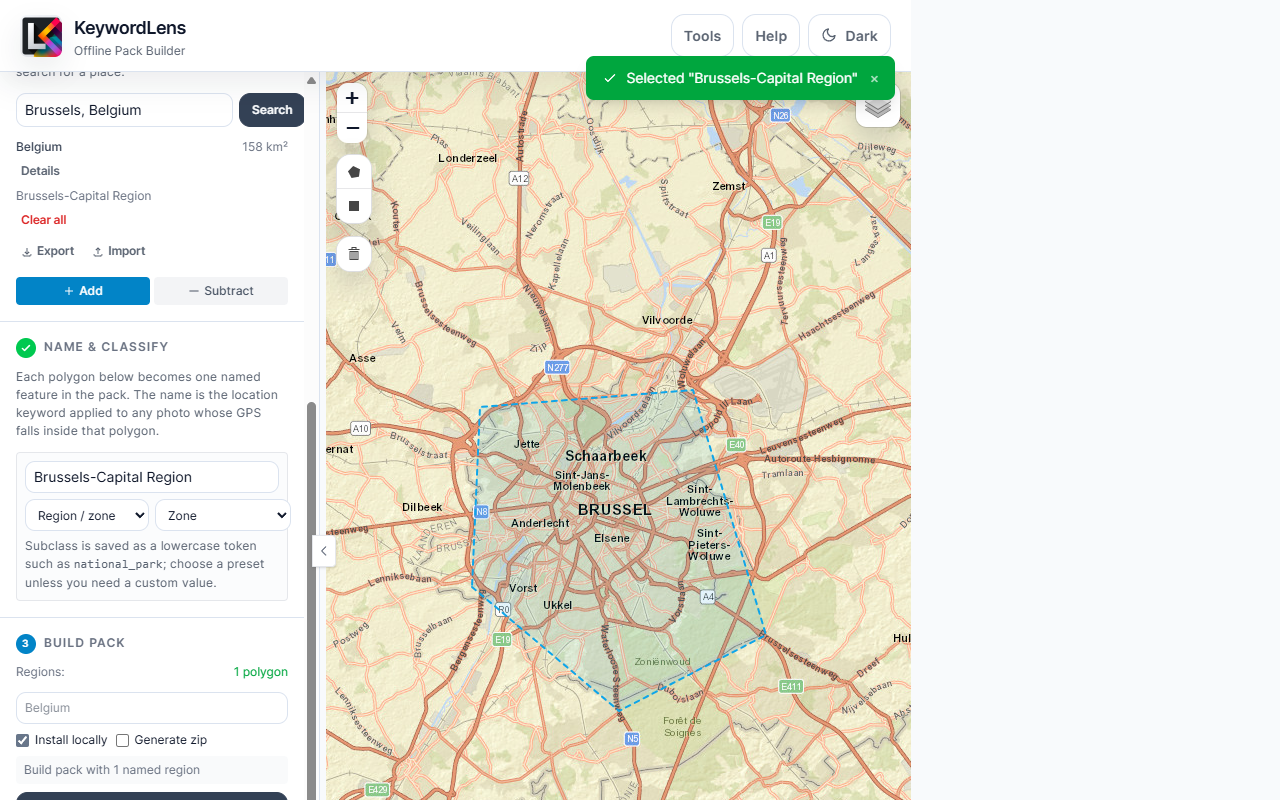
Named Region packs do not download POIs. Instead, you define an area and give it a place name. When a GPS-tagged photo falls inside that area, KeywordLens can associate the photo with that name. Use this for national parks, private reserves, farms, venues, event sites, or custom travel zones where the containing place matters more than nearby POIs.
- Select Named Region.
- Draw, search, or import one or more areas. Brussels is shown below as a simple city-region example.
- For each area, enter a name. This is the place name KeywordLens can use for GPS-tagged photos taken there.
- Choose a feature class. Protected area is a good default for reserves and private conservation areas; Region / zone is useful for broader custom areas.
- Choose a subclass preset such as
national_park,private_game_reserve,farm, orevent_site, or choose Custom... when no preset fits. Subclass values are stored as lowercase tokens, not display labels. - Build and install the pack.
Install and use built packs
The Build Pack section has two output choices. Install locally copies the completed pack into the offline-pack folder configured for KeywordLens and makes it appear under Installed Packs after the build succeeds. By default that folder is ~/.keywordlens/offline-packs/<pack_id>/. If you set an Offline packs folder in Plugin Manager, or start the backend with KEYWORDLENS_OFFLINE_LOCATION_PACKS_DIR, installed packs go there instead. KeywordLens can use that pack for offline GPS/place resolution when offline packs are enabled in Plugin Manager or the Analyze Photos flow.
Generate zip creates a distributable archive for sharing, backup, or catalog hosting. By default the zip is written under ~/.keywordlens/pack-builder-dist/<pack_id>.zip, with a companion catalog JSON for POI packs. If the backend data folder is changed with KEYWORDLENS_DB_DIR, the pack-builder-dist folder lives under that directory instead. A zip file by itself is not used by KeywordLens until it is also installed locally, installed later from a pack catalog, or copied into the offline-pack folder that the plugin/backend is configured to read. If you check both options, you get an installed local pack and a zip archive.
Use Refresh on an installed pack to rebuild the same pack with newer source data. Use Edit to load the pack's saved region and classes back into the builder before rebuilding. If you run the standalone builder or Docker with a different offline-pack folder, point Lightroom's KeywordLens offline-pack setting at the same folder so Lightroom analyses can use the packs you built.
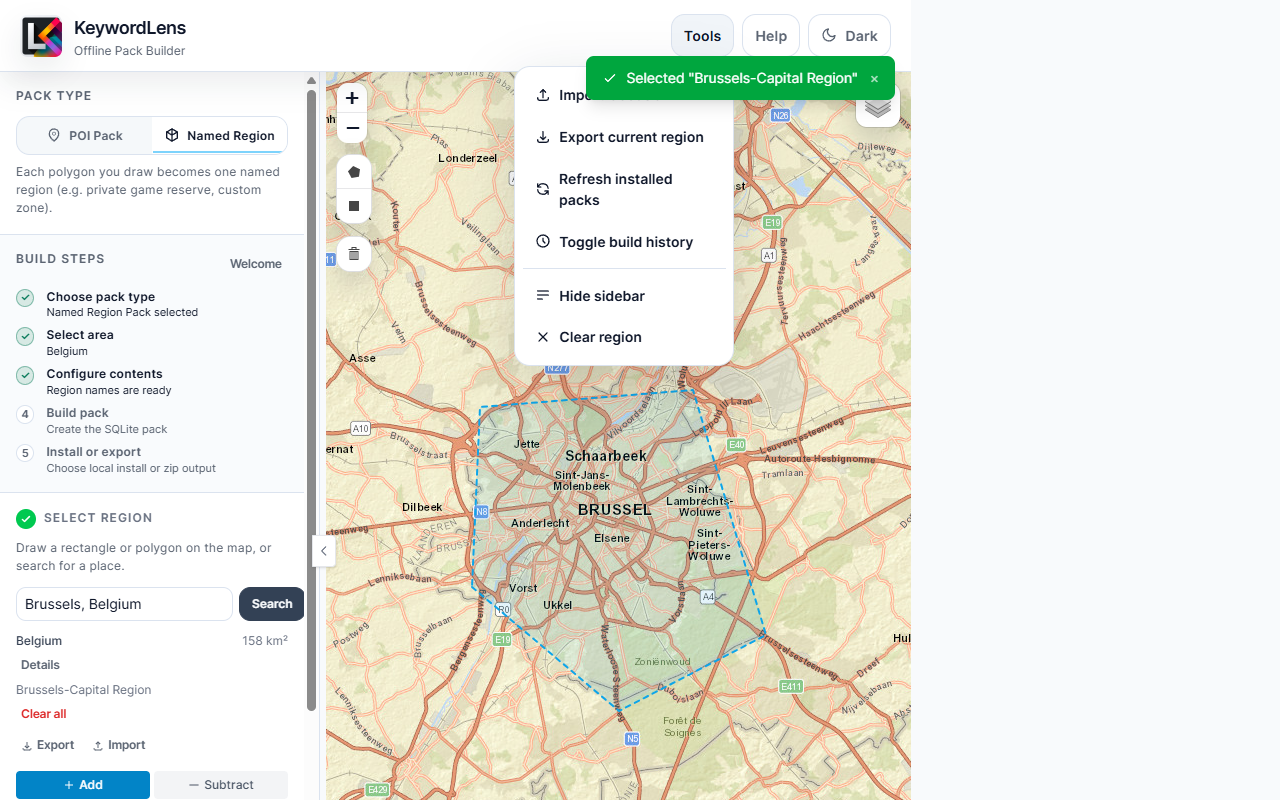
Use Tools and Help
The header keeps secondary actions out of the main workflow. Only one menu opens at a time.
Manage installed packs
The Installed Packs section lists packs found in your offline-pack folder. For each installed pack you can view details, refresh it with newer source data, edit its stored region/classes, rename the display name, or delete it from disk.
Use Refresh when you want the same pack rebuilt with updated OpenStreetMap or Natural Earth data. Use Edit when you want to load the saved region back into the builder and change coverage or classes before rebuilding.
Common issues
The builder page will not open
Make sure the backend is running, then open http://127.0.0.1:8099/tools/pack-builder. The standalone launcher and Lightroom menu both use the same backend.
Search picked the wrong place
Use English place names and include context such as city, region, and country. For example, try Camden, London, UK instead of only Camden. You can also use the draw tools or import GeoJSON for exact boundaries.
Privacy tools mention unpkg or cdnjs
The builder loads static browser libraries from public CDNs: Vue from unpkg.com renders the sidebar, welcome panel, checklist, and build status; Leaflet from unpkg.com renders the map; Leaflet Draw from cdnjs.cloudflare.com powers rectangle/polygon drawing and delete controls. KeywordLens does not use those CDN requests for analytics or tracking. If the page works, browser messages about blocked storage access are harmless; if your extension blocks the files completely, allow those two CDNs for this local builder page.
POI download is slow
Large regions and many OpenStreetMap classes can take time. Narrow the region or select fewer OSM classes before downloading.
The Build Pack button is disabled
In POI Pack mode, download POIs first. In Named Region mode, every selected area needs a name before the pack can be built.